
Ciao e bentornat*! Terminiamo il tutorial! Welcome back! Let’s finish the tutorial!
Stiamo avanzando spediti verso la fine, oggi! Se ti sei pers* le puntate precendenti del tutorial, qui trovi la terza parte, qui trovi la seconda parte, qui trovi la prima parte.
Off to the last part of the tutorial! If you’ve lost the previous parts, here’s the the third part, here’s the second part and here’s the first part.
Cosa manca ancora al cappotto? What’s left to the coat?
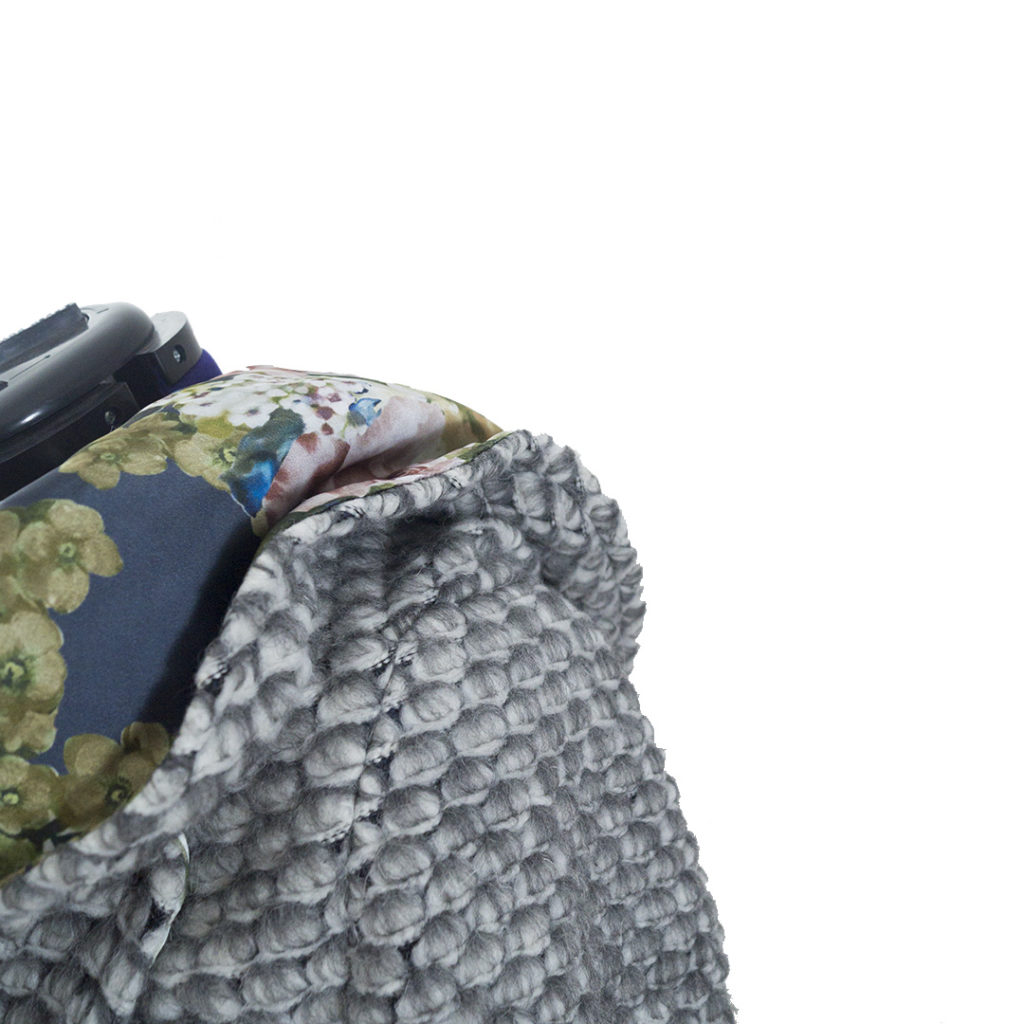
Al cappotto mancano ancora il giro manica e l’apertura per la tasca!
Your coat still needs the armhole and the pocket opening!
La manica! Sleeve!
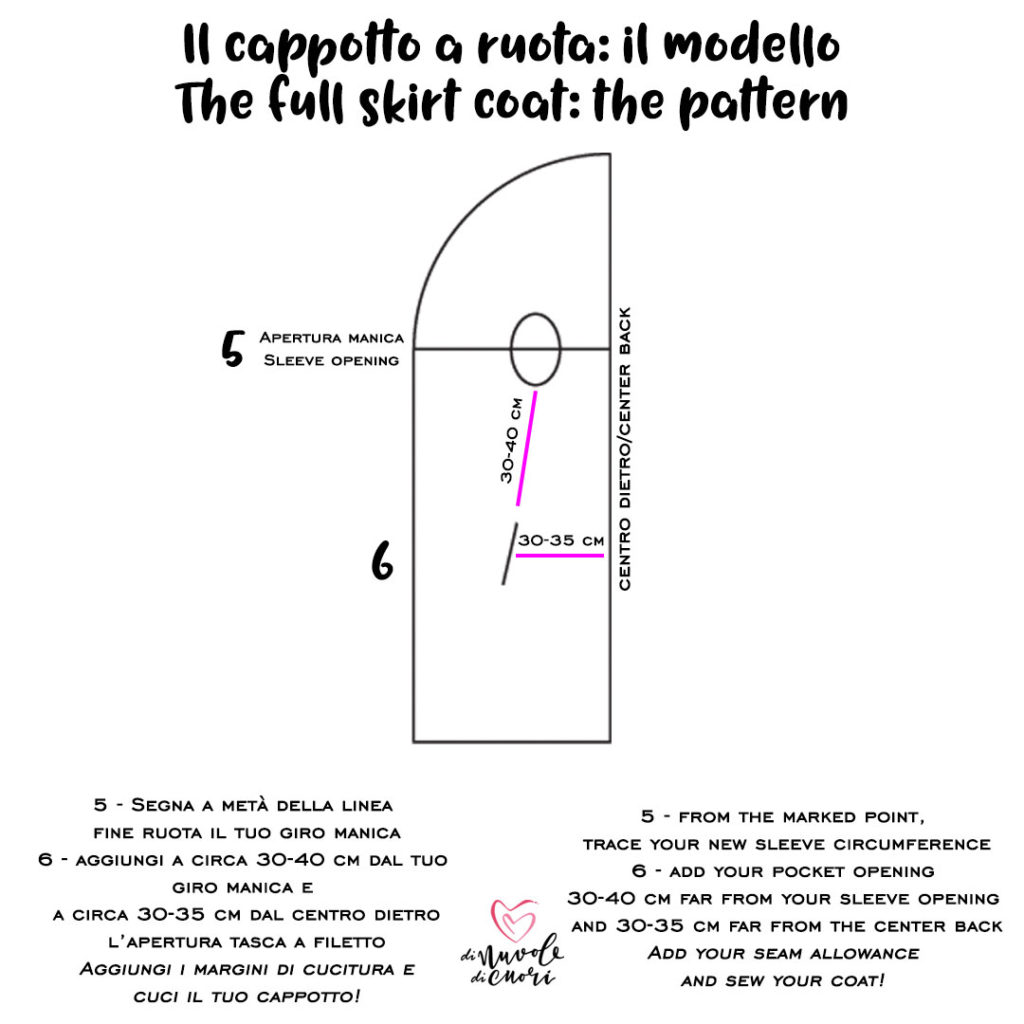
5 – Iniziamo con il giro manica: dal punto che avevi segnato nella parte terza, quindi la larghezza spalle, crea la circonferenza manica che hai segnato sulla tua manica o su di un foglio a parte.
5 – Let’s start with the armhole: from the point you created in the tutorial’s third part, so the shoulder width, draw the sleeve armhole you noted down on your sleeve or a side paper.
Il centro manica superiore posizionalo verso l’alto e il punto ascella verso il basso. Con questi due punti fermi crea la circonferenza necessaria sia per la parte davanti che per la parte dietro
Place the upper center sleeve on the upper part and the underarm on the lower part of the armhole. Use these two points to shape the front and back part of the armhole.
Ricordiamo che il giro manica è, in questo caso, qualche millimetro di circonferenza inferiore alla manica stessa. Un esempio te lo faccio con le cifre tonde che puoi applicare alla tua manica: se la tua manica misura 50cm di circonferenza, il tuo giro manica sarà di 49,2 cm.
Do not forget the armhole is, in this case, a bit smaller of the circumference of the sleeve. I will use a round number for a practical example, cause I think is more understandable: if your sleeve has a circumference of 50 cm, your armhole will be 49,2 cm.
Perchè questo dislivello? Perchè gli 0,8 cm di surplus di tessuto sono quelli che servono alla manica per girare bene sul giro manica e quindi distribuirai il surplus 0,5 cm sul davanti e 0,3 cm sul dietro.
Why that? Because the difference of 0.8 cm is the ease the sleeve needs in order to perfectlly distribute on the armhole. The ease can be divided 0,5 cm on the front sleeve and 0,3 cm on the back sleeve.
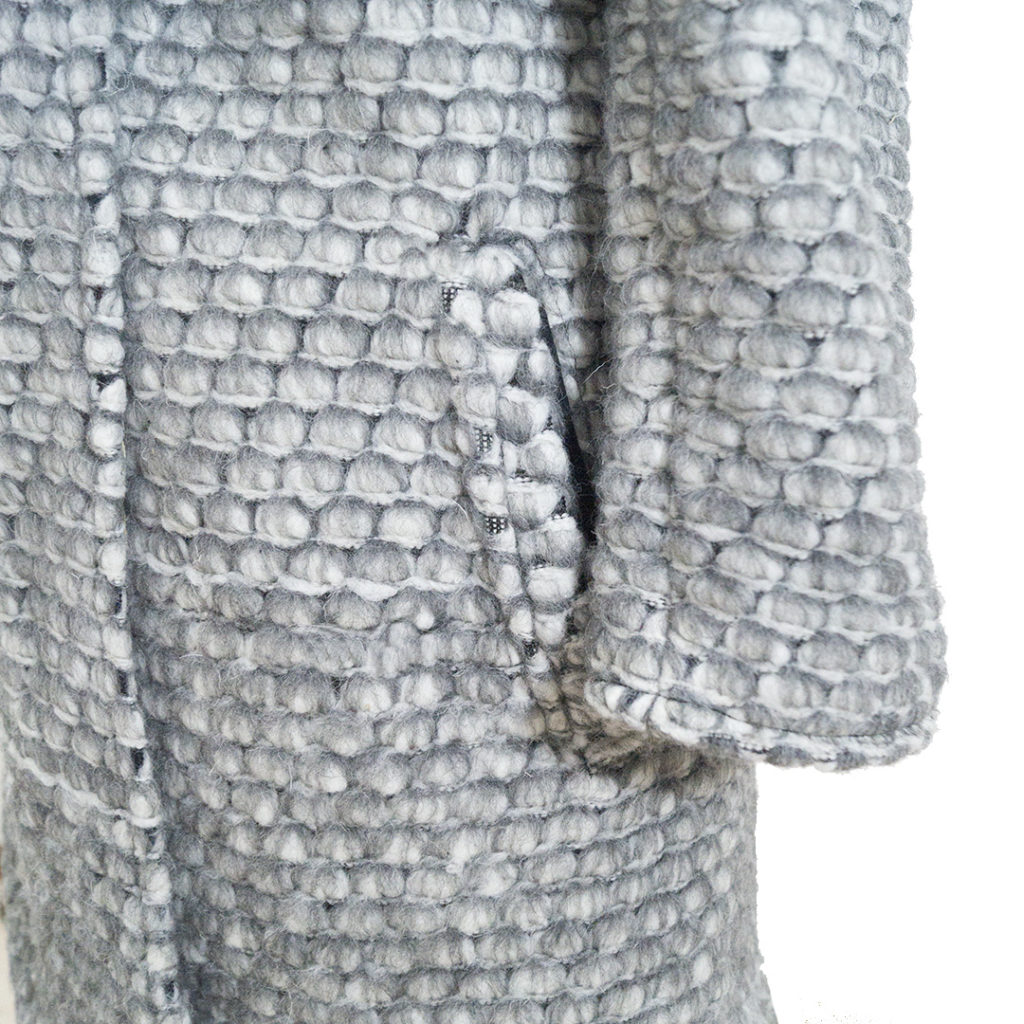
La tasca! Pocket!
6 – Ora che hai il giro manica, distanziati dal punto ascella del tuo giro manica di circa 30/40 cm a seconda della tua lunghezza braccio.
Una volta trovato il punto, parti dal centro dietro e distanziati di circa 30/35 cm. Trovati i due punti, traccia la tua apertura tasca!
6 – Now that you got your armhole, add your pocket opening 30-40 cm far from your sleeve opening and 30-35 cm far from the center back.
Spero che il tutorial vi sia stato d’aiuto! La prossima settimana uscirà il riepilogo completo!
Hope the tutorial was useful! Next week, there’s the recap of all of it!

Ciao, alla prossima, ti aspetto! See ya!
Se ti va di seguirmi su Instagram o Facebook, mi trovi con il nome DiNuvoleDiCuori! You can find me on Facebook or Instagram looking for DiNuvoleDiCuori!
Post in collaborazione con LaFab Tessuti
Autore

Sarta per passione. Pompelmo rosa e cedrata lover. Benvenut*!