
Terminiamo oggi la nostra tasca! Let’s finish our pocket!
Benvenut*, andiamo avanti a cucire la gonna a ruota presente su La Mia Boutique di Ottobre 2019 concludendo la tasca!
Qui trovi la prima parte del tutorial, qui la seconda parte con la patta, qui la prima parte del filetto, qui la seconda parte del filetto e qui la terza parte del filetto!
Here you find the part of the tutorial, here the second part, here the first part of the welt pocket, here the second part of the welt pocket and here the third part of the welt pocket!
Due note importanti prima di iniziare:
Tutti margini di cucitura che vedrai in questo tutorial sono di 1 cm per le cuciture e 0.7 cm per le impunture. Se preferisci farle diverse, adattale pure a te! Prima di iniziare a cucire, consiglio spassionato per esperienza, arriva fino in fondo al tutorial per saperti regolare con tutti i passaggi ed avere un’idea generale.
Please read this before starting:
All seam allowances in this tutorial are 1 cm and 0.7 cm for topstitching. Feel free to adapt them to you if they don’t suit you! Before starting to sew, a little bit of unwanted advice, read carefully through all of the tutorial, to have a complete idea and know where you’re going.

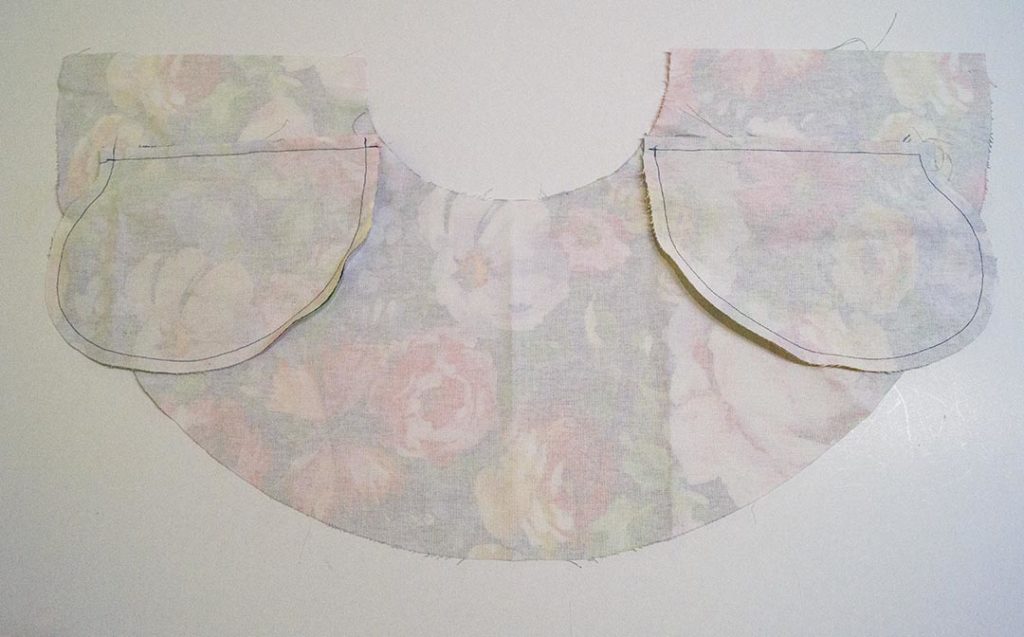
Prendi la tasca che avevi lasciato da parte e mettila, dritto contro dritto, su quella inserita nel filetto.
Take the pocket you’ve left behind and place it on top of the welt pocket, right side together.
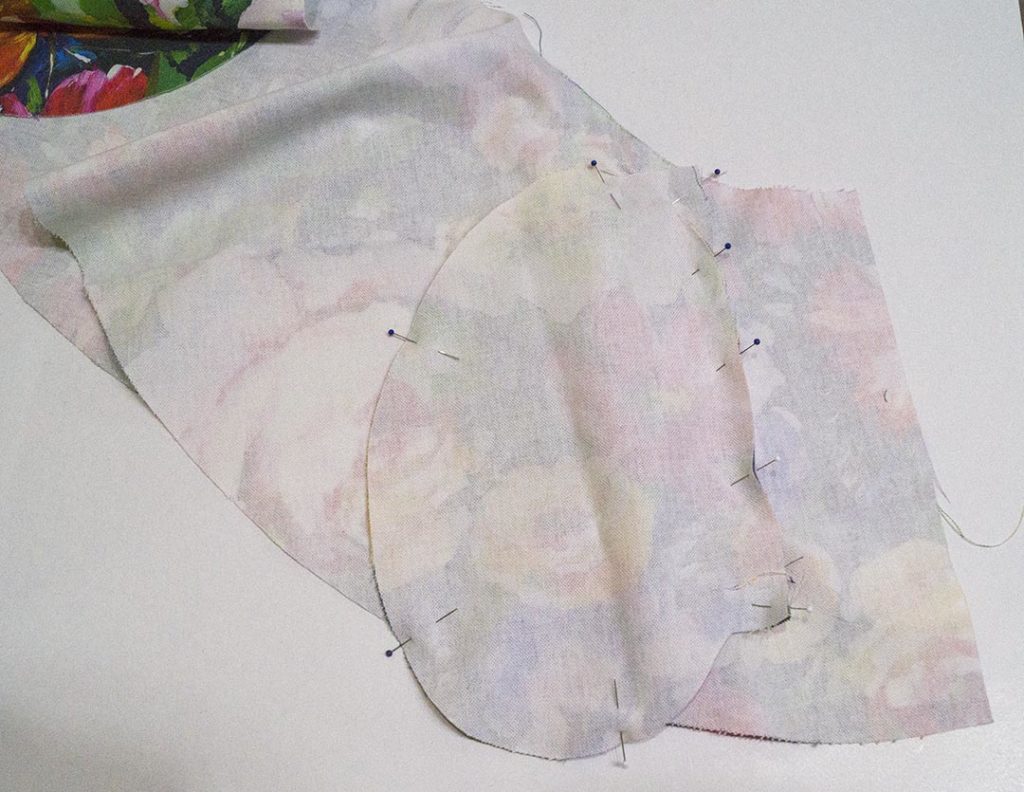
Spillale insieme per prepararti alla cucitura. Pin them together.

Cuci ad 1 cm. Sew them with a 1 cm seam allowance.

Ed ecco come si presenta la tasca cucita dall’interno… This is the look of the pocket from the inside…
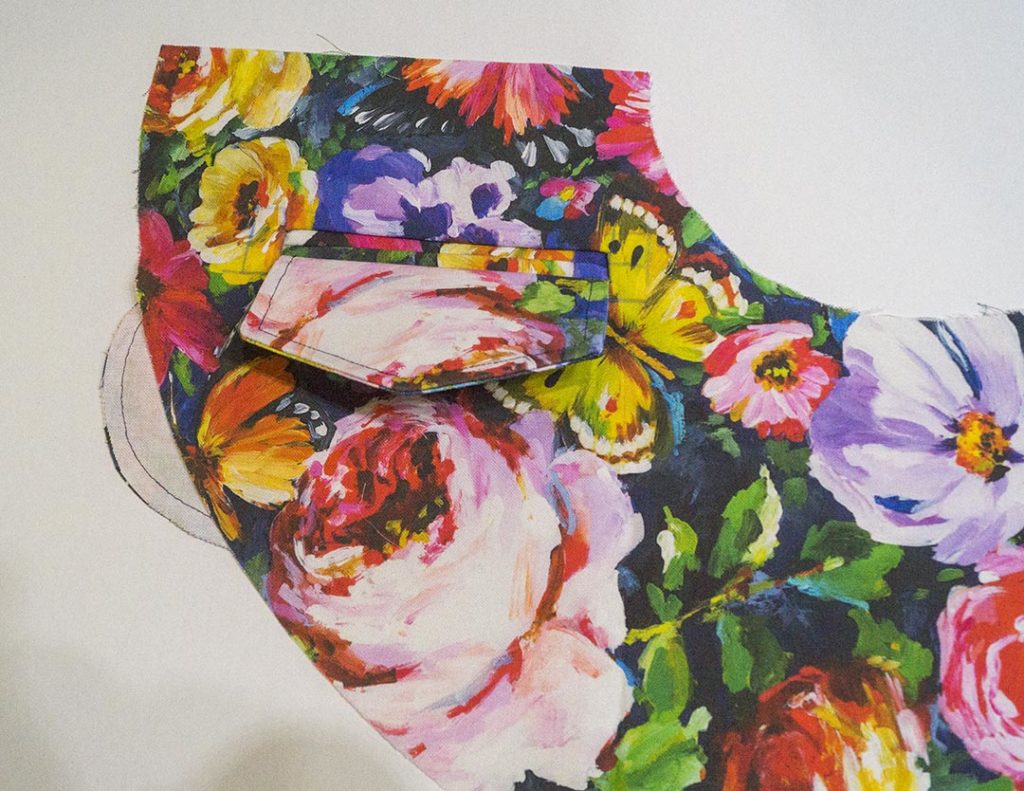
e dall’esterno. and the outside.
Ad entrambe le tasche ora va applicato lo sbieco per pulire e non fare sfrangiare il tessuto.
Now it’s time to apply the bias on the pockets, to secure the fabric from fraying.

Per montare lo sbieco, ci sono diversi modi, con e senza strumenti aggiuntivi: in questo tutorial ti farò vedere gli strumenti che ho utilizzato e che puoi trovare online o in un negozio. Lo sbiecatore che vedi sopra, con una parte in plastica è molto maneggievole e si monta in un battito di ciglia sulla tua macchina da cucire. E’ uno sbiecatore universale, quindi, teoricamente, dovrebbe essere montabile su una qualsiasi macchina, però controlla prima il tuo modello se lo supporta.
There are different methods to sew bias on a garment. I’m showing here the tools I use to sew the bias and both can be found online or in a store near you. The bias tool you are seeing up here is really cute and fast to apply to your sewing machine. It is said that it can be placed on every sewing machine but I’m not 100% sure, so be careful and check it twice if it goes on your sewing machine as well.
Questo sbiecatore è acquistabile online sia su Amazon che nei vari negozi online o fisici!
You can buy this bias tool both on Amazon and in the sewing stores, online or near you!

Quello che vedi sopra, invece, è l’adattamento di un piedino industriale per macchina da cucire casalinga creato da Gnoato Lino. Il piedino di per sè è molto comodo, ma non si può montare su tutte le macchine da cucire, poichè va fermato con una vite sulla macchina. Se la tua macchina da cucire non presenta un foro nel quale inserire la vite nel suo corpo, purtroppo questo piedino non fa per te.
The one you see in the photo above is the adaptation of an industrial sewing foot, created by Gnoato Lino. This adaptation is really useful, but it cannot be placed on every single sewing machine. You must have on your machine one hole where insert a screw to keep it in place. If your sewing machine doesn’t have that hole, then it’s not the right bias tool to buy.

Io utilizzo questo piedino sulla mia prima macchina da cucire, una Pfaff 84 che come si può vedere dalle foto, presenta sulla placca due fori che permettono l’applicazione di questo piedino.
I use it on my very first sewing machine, a Pfaff 84, cause it has two holes for the screw to stay in place.

Questo piedino è molto comodo poichè permette, in un solo passaggio, di applicare lo sbieco in maniera pulita e veloce.
This sewing foot allows you to sew your bias in a very quick and perfect way.

Una volta terminata la parte dritta della tasca, taglia le estremità e procedi a cucire lo sbieco sulla parte tonda.
Once you’re done the straight part of the pocket, cut the far ends and go on with sewing the bias on the curved part.

E’ possibile che ci sia un punto in cui tu debba togliere e riaggiungere lo sbieco, come è successo a me. Ricomincia un pò prima e reinserisci lo sbieco, nel passaggio successivo ti mostro come fermare lo sbieco e non farlo venire via.
It’s possible that at some point, you might stop and restart to sew the bias, as it happened to me. Get back with the bias and I’ll show you in the next step how to secure it.

Piega le estremità e fissale con un punto avanti-indietro della macchina da cucire.
Fold the far ends inside and stitch them in place.

Una volta fissate le estremità, come sopra, tagliale di modo da avere uno sbieco pulito e in ordine!
Once you’re done with stitching the far ends, cut them off, so that you’re left with a nice and clean bias!
Con oggi abbiamo finito il filetto della nostra tasca!
We’re done with the welt pocket!

Ciao, alla prossima, vi aspetto ! See ya!
Se ti va di seguirmi su Instagram o Facebook, mi trovi con il nome DiNuvoleDiCuori!
You can find me on Facebook or Instagram looking for DiNuvoleDiCuori!
Autore

Sarta per passione. Pompelmo rosa e cedrata lover. Benvenut*!